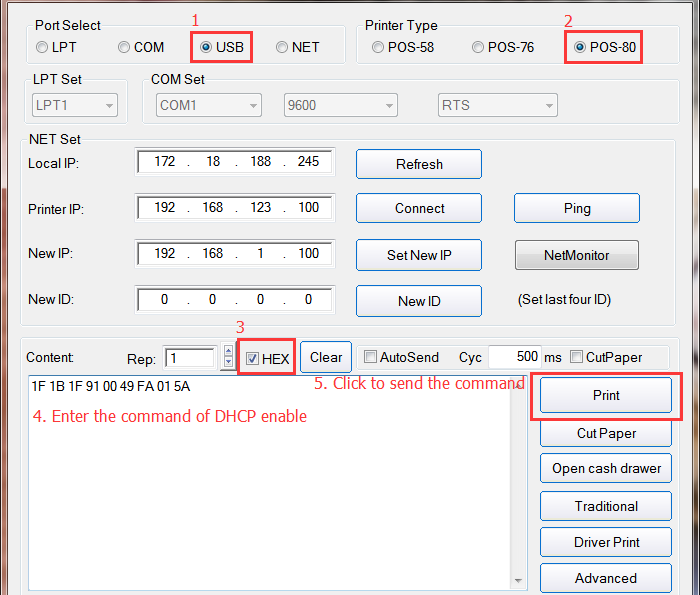
1、Connect the printer with PC by USB cable.
2、Open the setting tool ‘PrinterTEST’ on driver CD.
3、Then you can enter the HEX command about DHCP( ‘1F 1B 1F 91 00 49 FA 01 5A’ to enable, ‘1F 1B 1F 91 00 49 FA 00 5A’ to disable) to function it.
4、After sending the command to enable DHCP, you can connect the LAN port and print a selftest page to check the assigned IP address.
Graphical description:
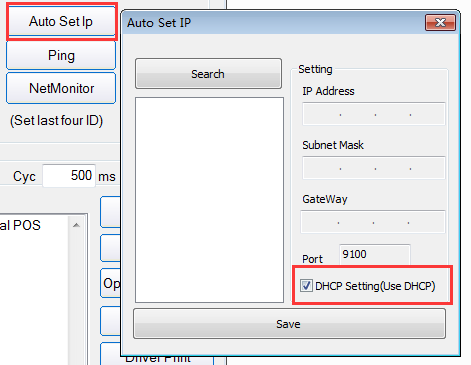
If your printer model comes with the V3.1 setting tool, you can directly go to the ‘Auto set up’, select the ‘DHCP Setting’ to enable
Comments
0 comments
Please sign in to leave a comment.