
Machine installation video tutorial: http://u.pc.cd/kYectalK
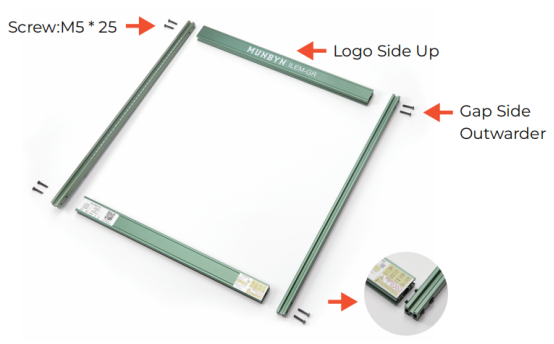
Step 1
- Assemble the frame with 8 screws (M5*25) as shown in the figure.
Step 2
- Slide the x-axis rail into the frame along the Y-axis rail so that the Y-axis rail is sandwiched between the pulleys at both ends of the x-axis.
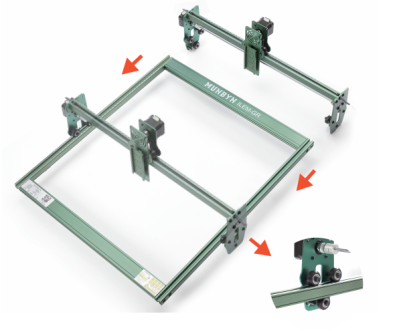
- Install the foot bracket.

Step 3
(1) Insert the belt along the guide rail of the Y-axis.
(2) Pass the belt through the pulleys of the X-axis.
(3) Tighten the belt and lock the belt with screws and gaskets.
(4)Put on three black blocks.
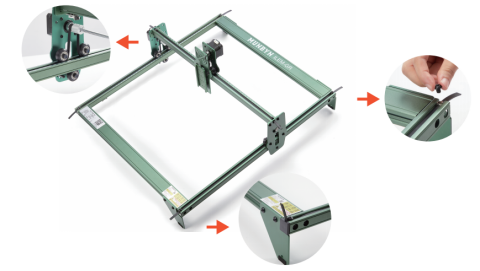
- Install the control box.
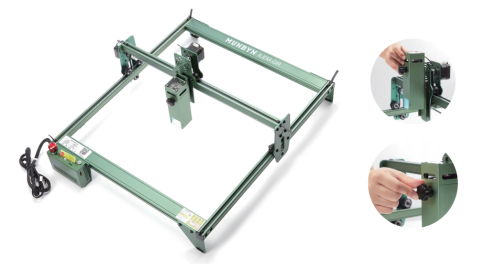
Step 4
- Install the laser head on the laser head bracket of the X-axis.
- Adjust the height of the laser head through the Torx handle.
Step 5
- Use a wrench to turn the eccentric nut to adjust the tightness of the guide wheel and the guide rail.
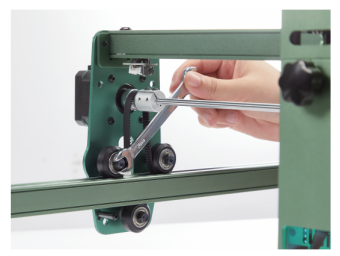
The adjustment operation of the X-axis nut is the same as above.
Tips: How to determine the tightness of eccentric nuts?
Under the condition of ensuring that the bracket does not shake, you can lift one end of the machine to an angle of 45 degrees with the horizontal plane, and release the X-axis or Y-axis bracket from a high place. If the bracket can slide at a constant speed to the end, the tightness is suitable.
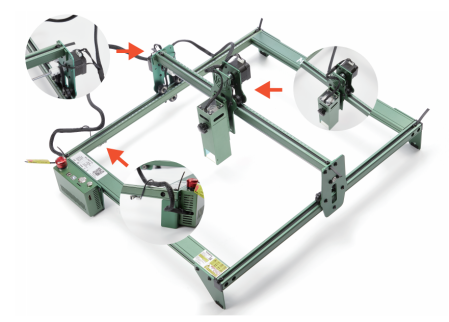
Step 6
- Connect the Y-axis motor.
- Connect the X-axis motor.
- Connect the laser control cable.
- Connect the wires to the limit switches of the X-axis and Y-axis.
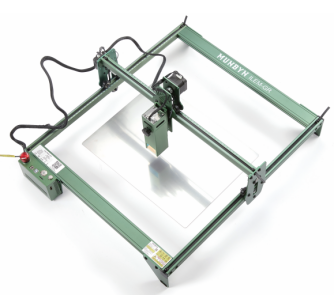
Step 7
- As shown in the picture, place the cutting pad under the engraved/cut object.
- As shown in the figure, the cutting pad should be placed to cover the working area as far as possible.
Comments
0 comments
Please sign in to leave a comment.