1、Press the "SCAN” button for 2s to turn on the scanner.
2、Put your target (document/photo/receipt/book) on a flat desk.
3、After placing the scanner on the target, press the "SCAN" button to start scanning.
4、Slide the scanner over the target smoothly and slowly, making sure the green light is always on.

Figure 2-3 Scanning File
5、Press the "SCAN" button to complete the scanning, then the number shown on LCD screen will increase 1 automatically.
6、Connect the scanner to a computer by the USB cable, then the LCD screen will display “USb” as follow, and you can find the scanned files on your computer.
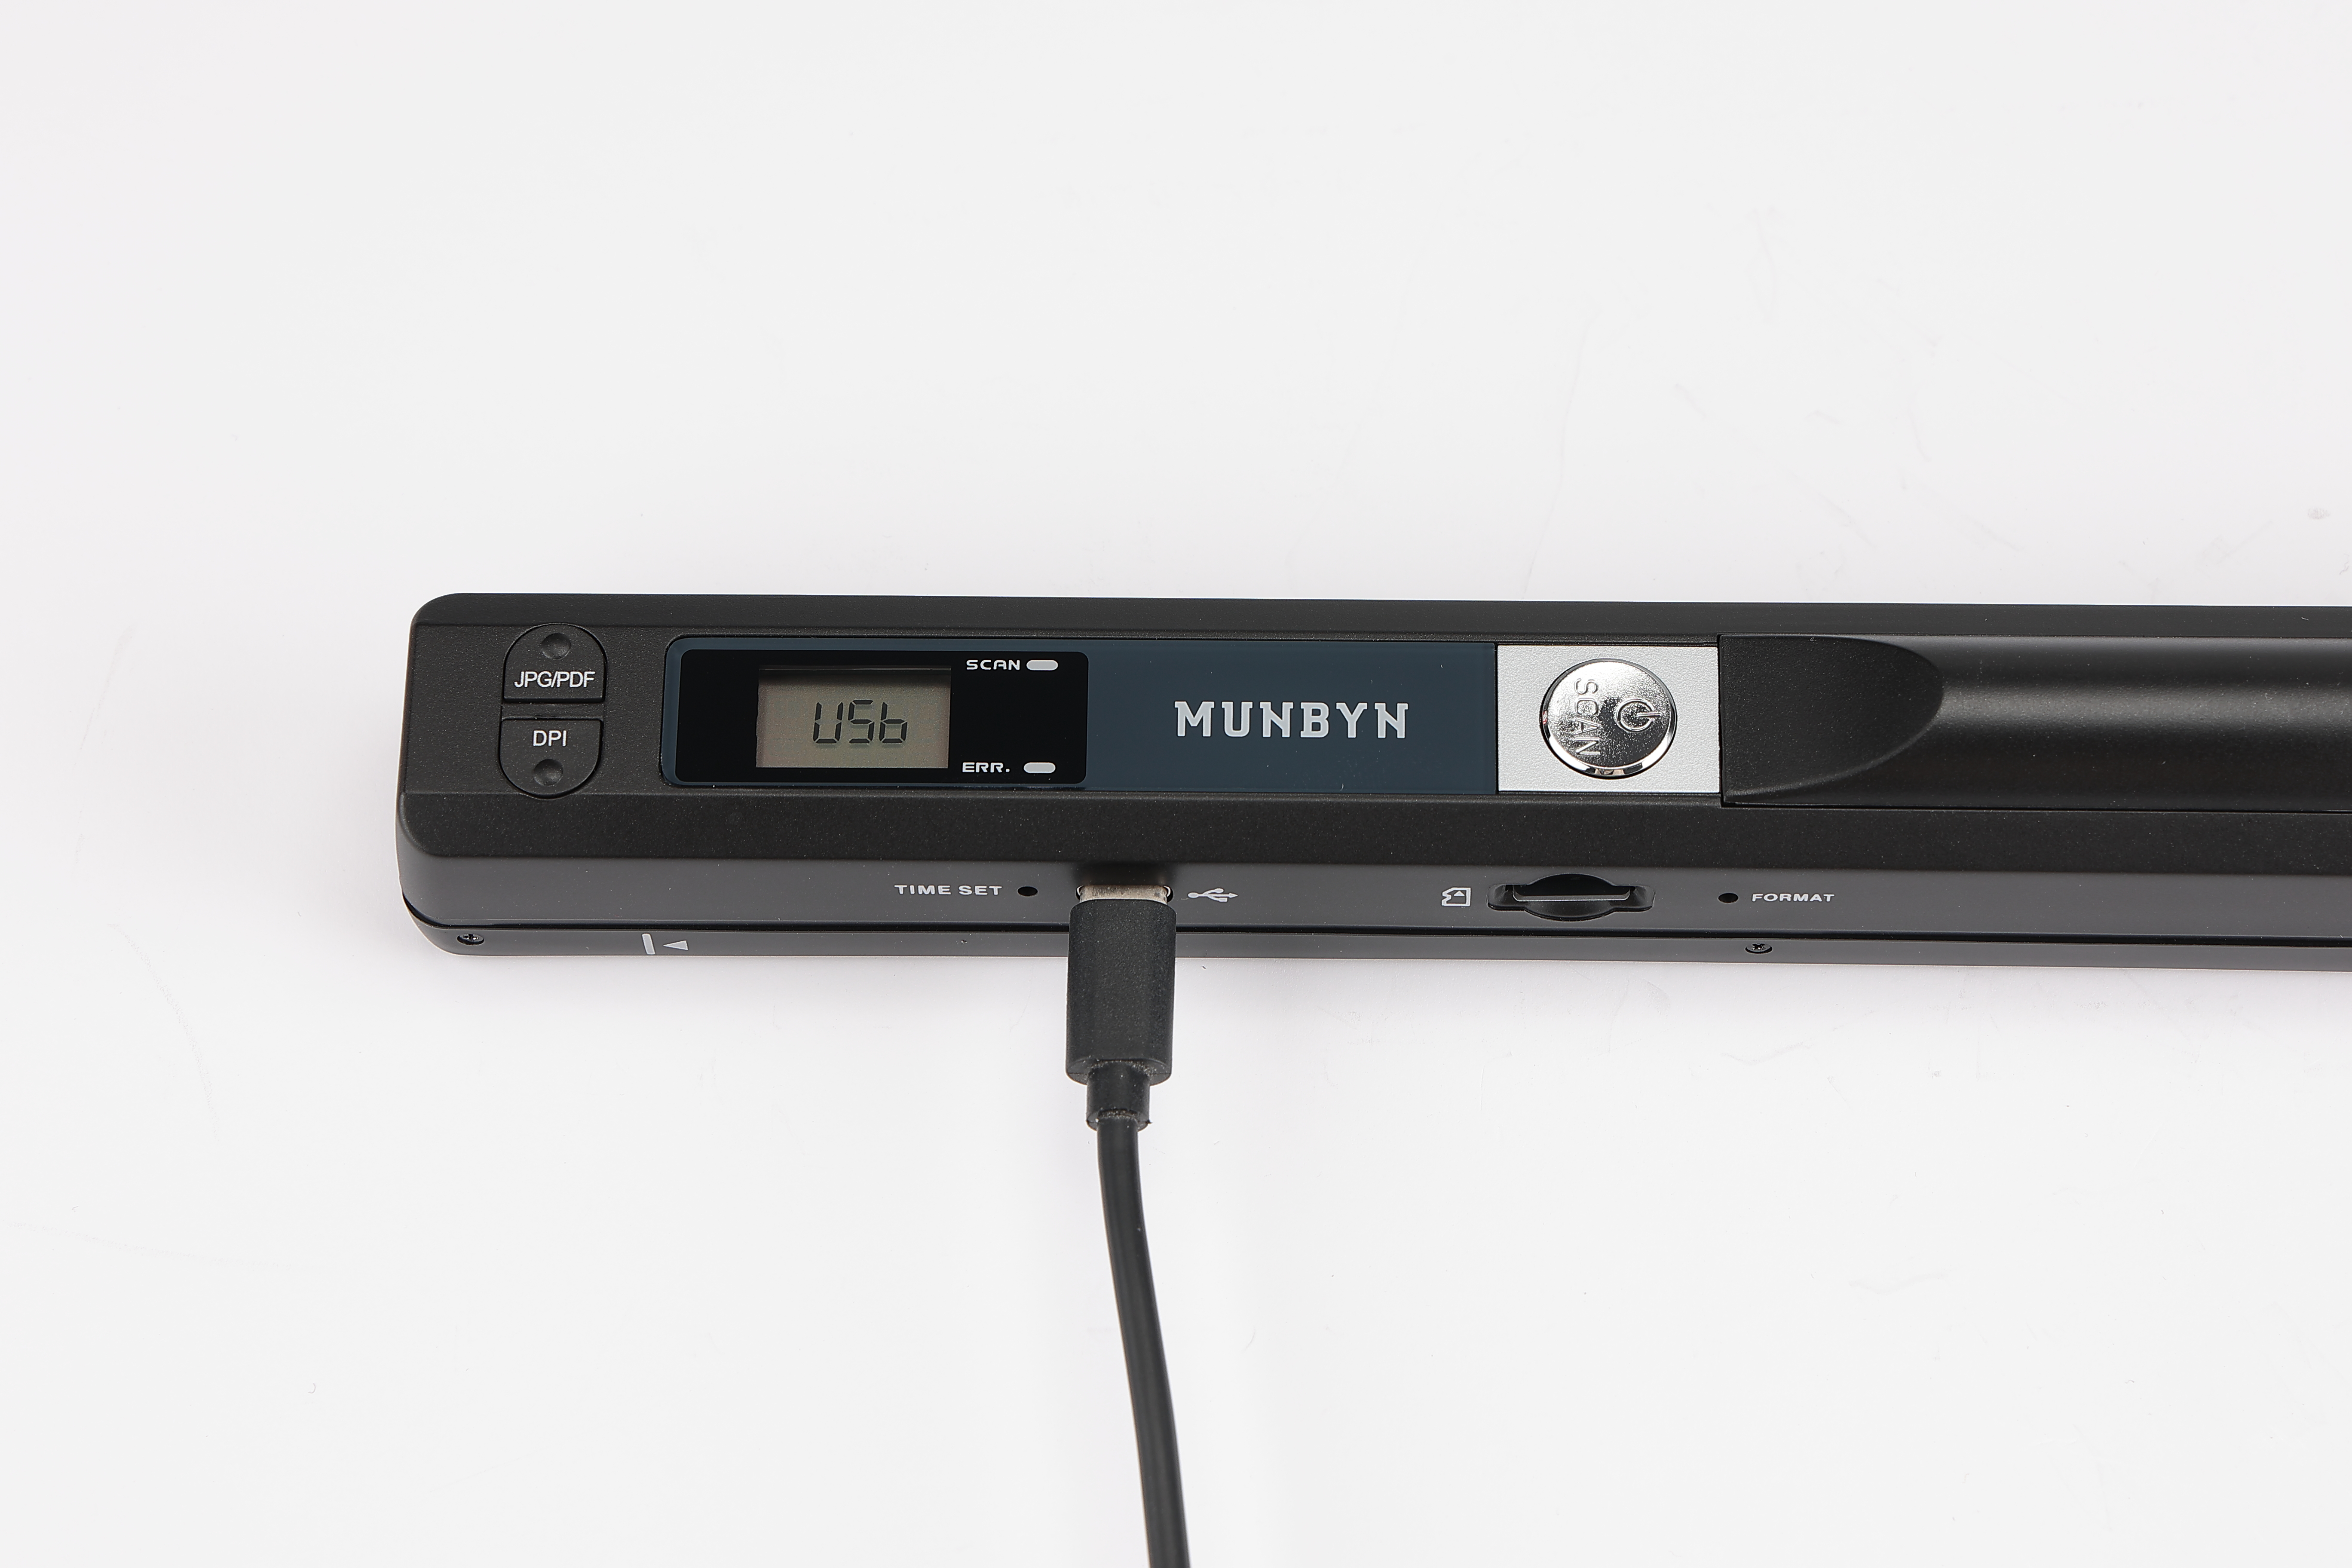
Figure 2-4 Connect Computer
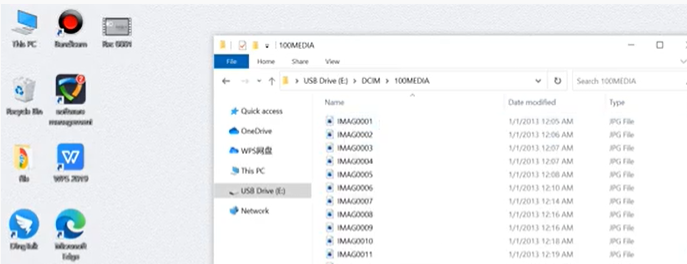
Figure 2-5 View Scanned Files
Notes:
- About size: The maximum size of the scanned target is 8.27 inches. If the target is over this limit, it is recommended that you perform segmented scanning reasonably.
Scanning and Files Transfer Tutorial Video Link: https://munbyn.biz/001s
Comments
0 comments
Please sign in to leave a comment.